
Add a unique handmade touch to your wardrobe with a simple yet striking quilt block!
This design works beautifully on a T-shirt or sweatshirt and creates a subtle 3D effect through clever color placement.
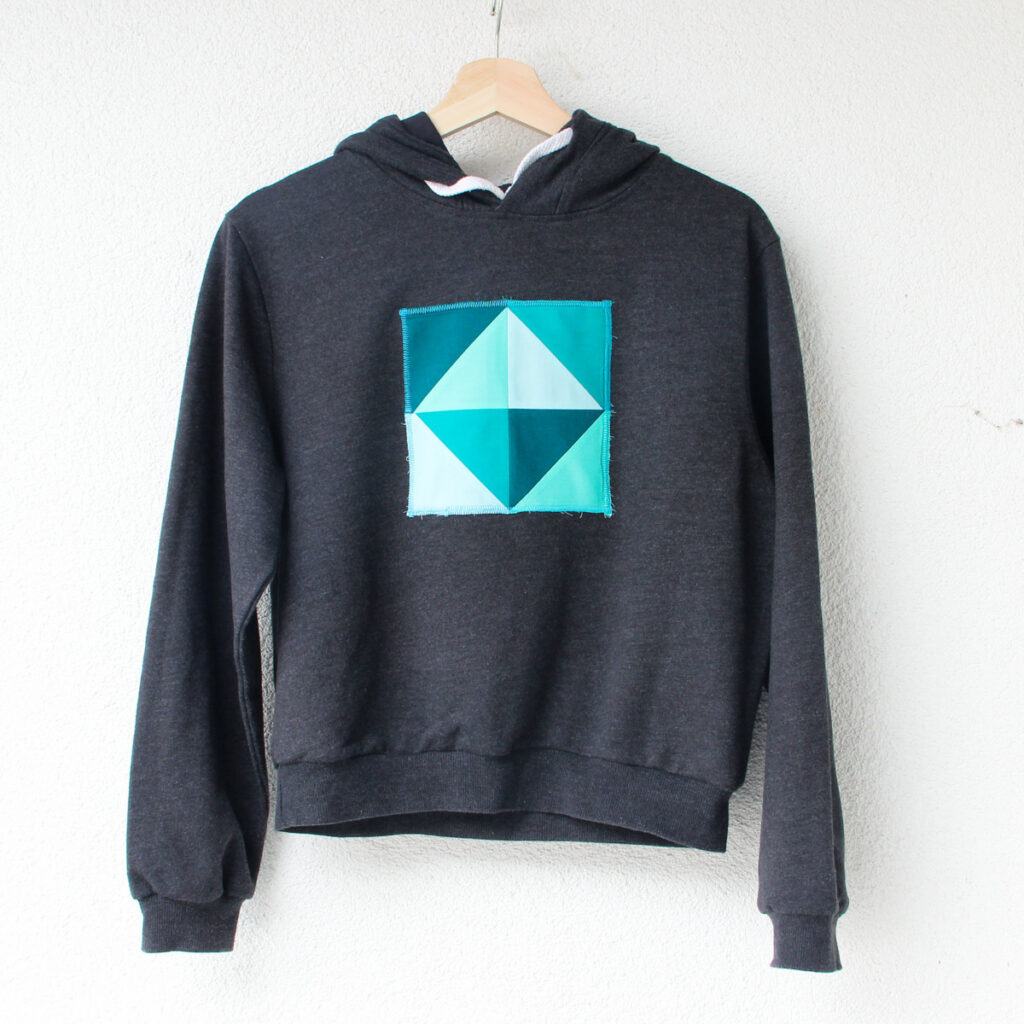
A beginner-friendly project using HSTs for quick, eye-catching results. The illusion of depth comes from your fabric choices. Using different shades of the same color enhances the 3D look, but feel free to experiment — bold contrasts and playful color combinations work just as well.
Materials You’ll Need
- 4 fabric squares, 4 × 4 inches, each in a different color
- Sewing tools: rotary cutter and cutting mat, thread, sewing machine, pins
- A T-shirt or sweatshirt
- Double-sided fusible interfacing (approx. 7 × 7 inches)
- Iron
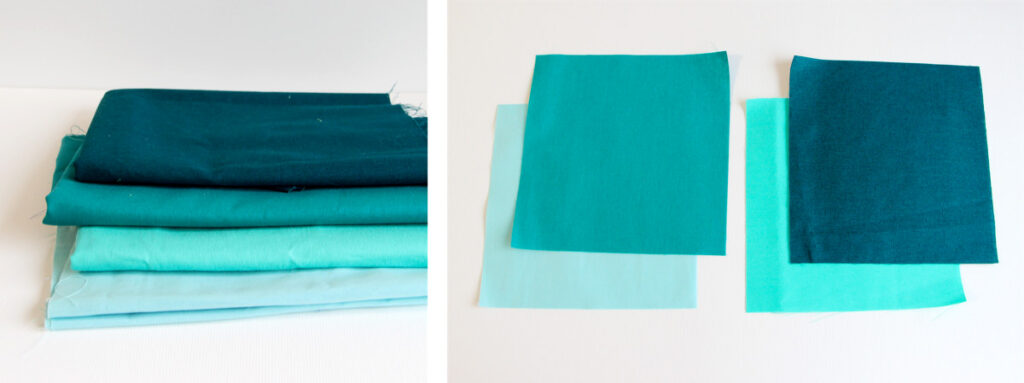
How to Make the Quilt Block
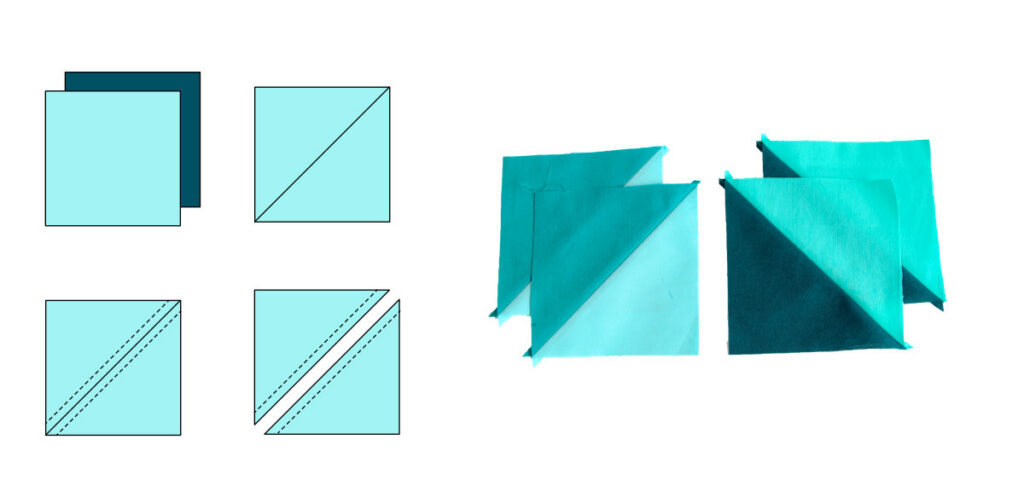
Step 1: Pair the squares as shown in the diagram, placing them right sides together.
Step 2: On the wrong side of one square, draw a diagonal line from corner to corner and pin the layers together to keep them from shifting while sewing.
Step 3: Stitch along both sides of the drawn diagonal line, using a ¼” seam allowance.
Step 4: Cut the piece apart along the diagonal line.
Step 5: Press the finished half-square triangles (HSTs) open.
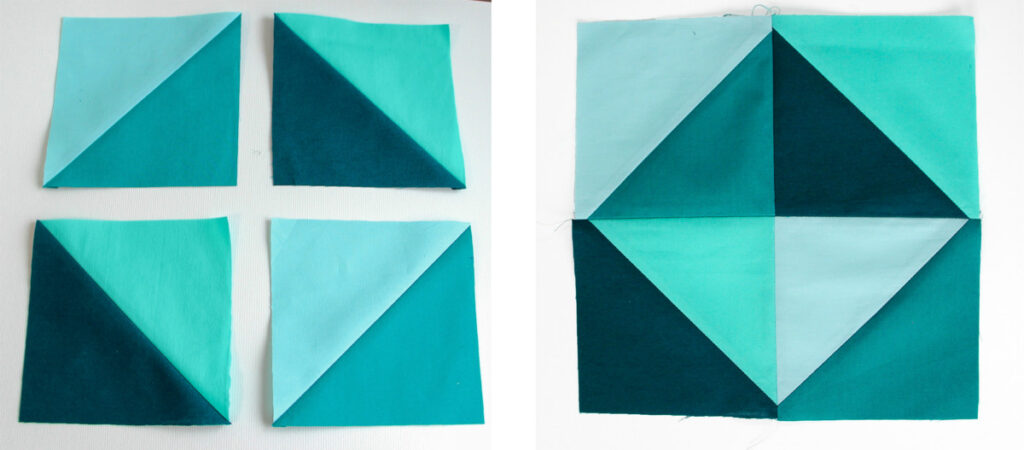
Step 6: Arrange the HSTs as shown in the diagram, sew them together, and press the seams open.
Step 7: Then mark on your T-shirt where you want to place the block.
(To attach it to the T-shirt, you can leave the edges raw and use a zigzag stitch, or press the edges under by 1/4 inch and topstitch.)
Step 8: Pin the block to the T-shirt, or use double-sided adhesive interfacing: press it to the block first, then press the block onto the T-shirt.
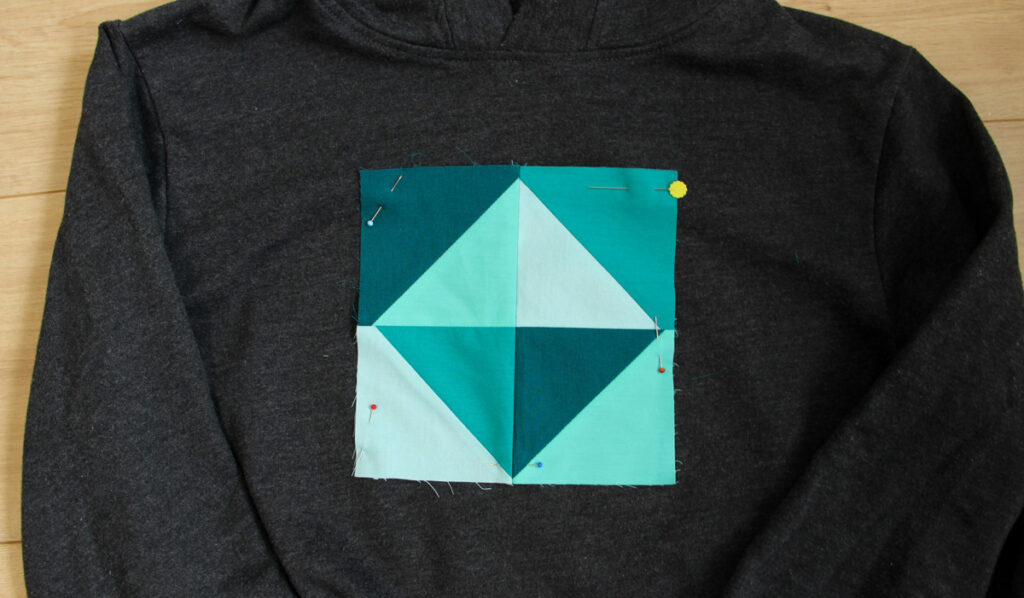
Step 9: Topstitch or zig zag stitch the block onto the T-shirt—and wear it with joy!
Enjoy the process — and let yourself get into the creative flow as you stitch!